ShopOps Tutorial
Getting started with ShopOps, an agent-native e-commerce platform (To-Agent marketplace) built on a headless architecture, enabling merchants to sell directly to AI agents (e.g. ChatGPT) with zero manual operations.
ShopOps is a platform, not an infrastructure or SaaS tool. Its role is to programmatically match user agent demand with real merchant supply and carry transactions.
ShopOps supports three integration surfaces:
- Shopify app – fast onboarding for Shopify merchants
- API – for custom / self-hosted / headless commerce sites
- SDK – for consumer-facing AI agents and applications
This guide focuses on the Shopify app flow, the fastest way for merchants to join the ShopOps To-Agent marketplace.
Note: This guide applies to merchants using ShopOps before version 1.1.
Platform Architecture Overview
ShopOps is an agent-native e-commerce platform, implemented with a headless architecture.
Key characteristics:
- No consumer-facing storefront
- No manual merchandising or channel operations
- No subscription or fixed SaaS fees
As a platform, ShopOps:
- Acts as the marketplace-level matching layer between Agent demand and merchant supply
- Serves as the transaction carrier for agent-driven commerce
- Handles pricing context, checkout, fulfillment, and after-sales responsibility boundaries
- Monetizes purely via transaction-based commission (CPS, 10–25%)
For Shopify merchants, ShopOps functions as a platform-level distribution and transaction layer, not a theme replacement.
Step 1: Install the ShopOps App
- Open the private installation link below and click Install in the Shopify UI to grant permissions:
- Approve the requested permissions.
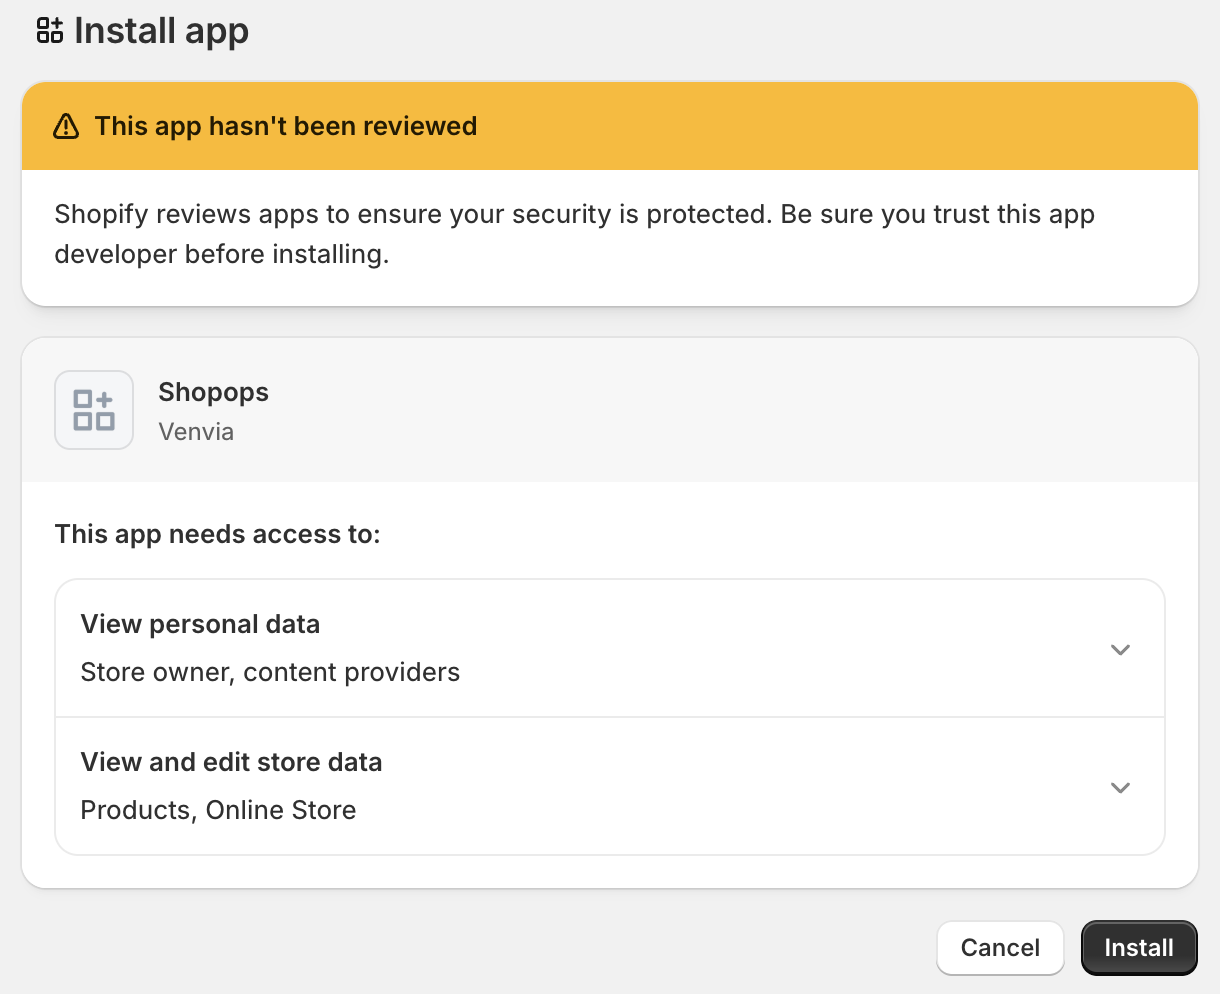
The app connects your catalog, inventory, and fulfillment signals to the ShopOps platform.
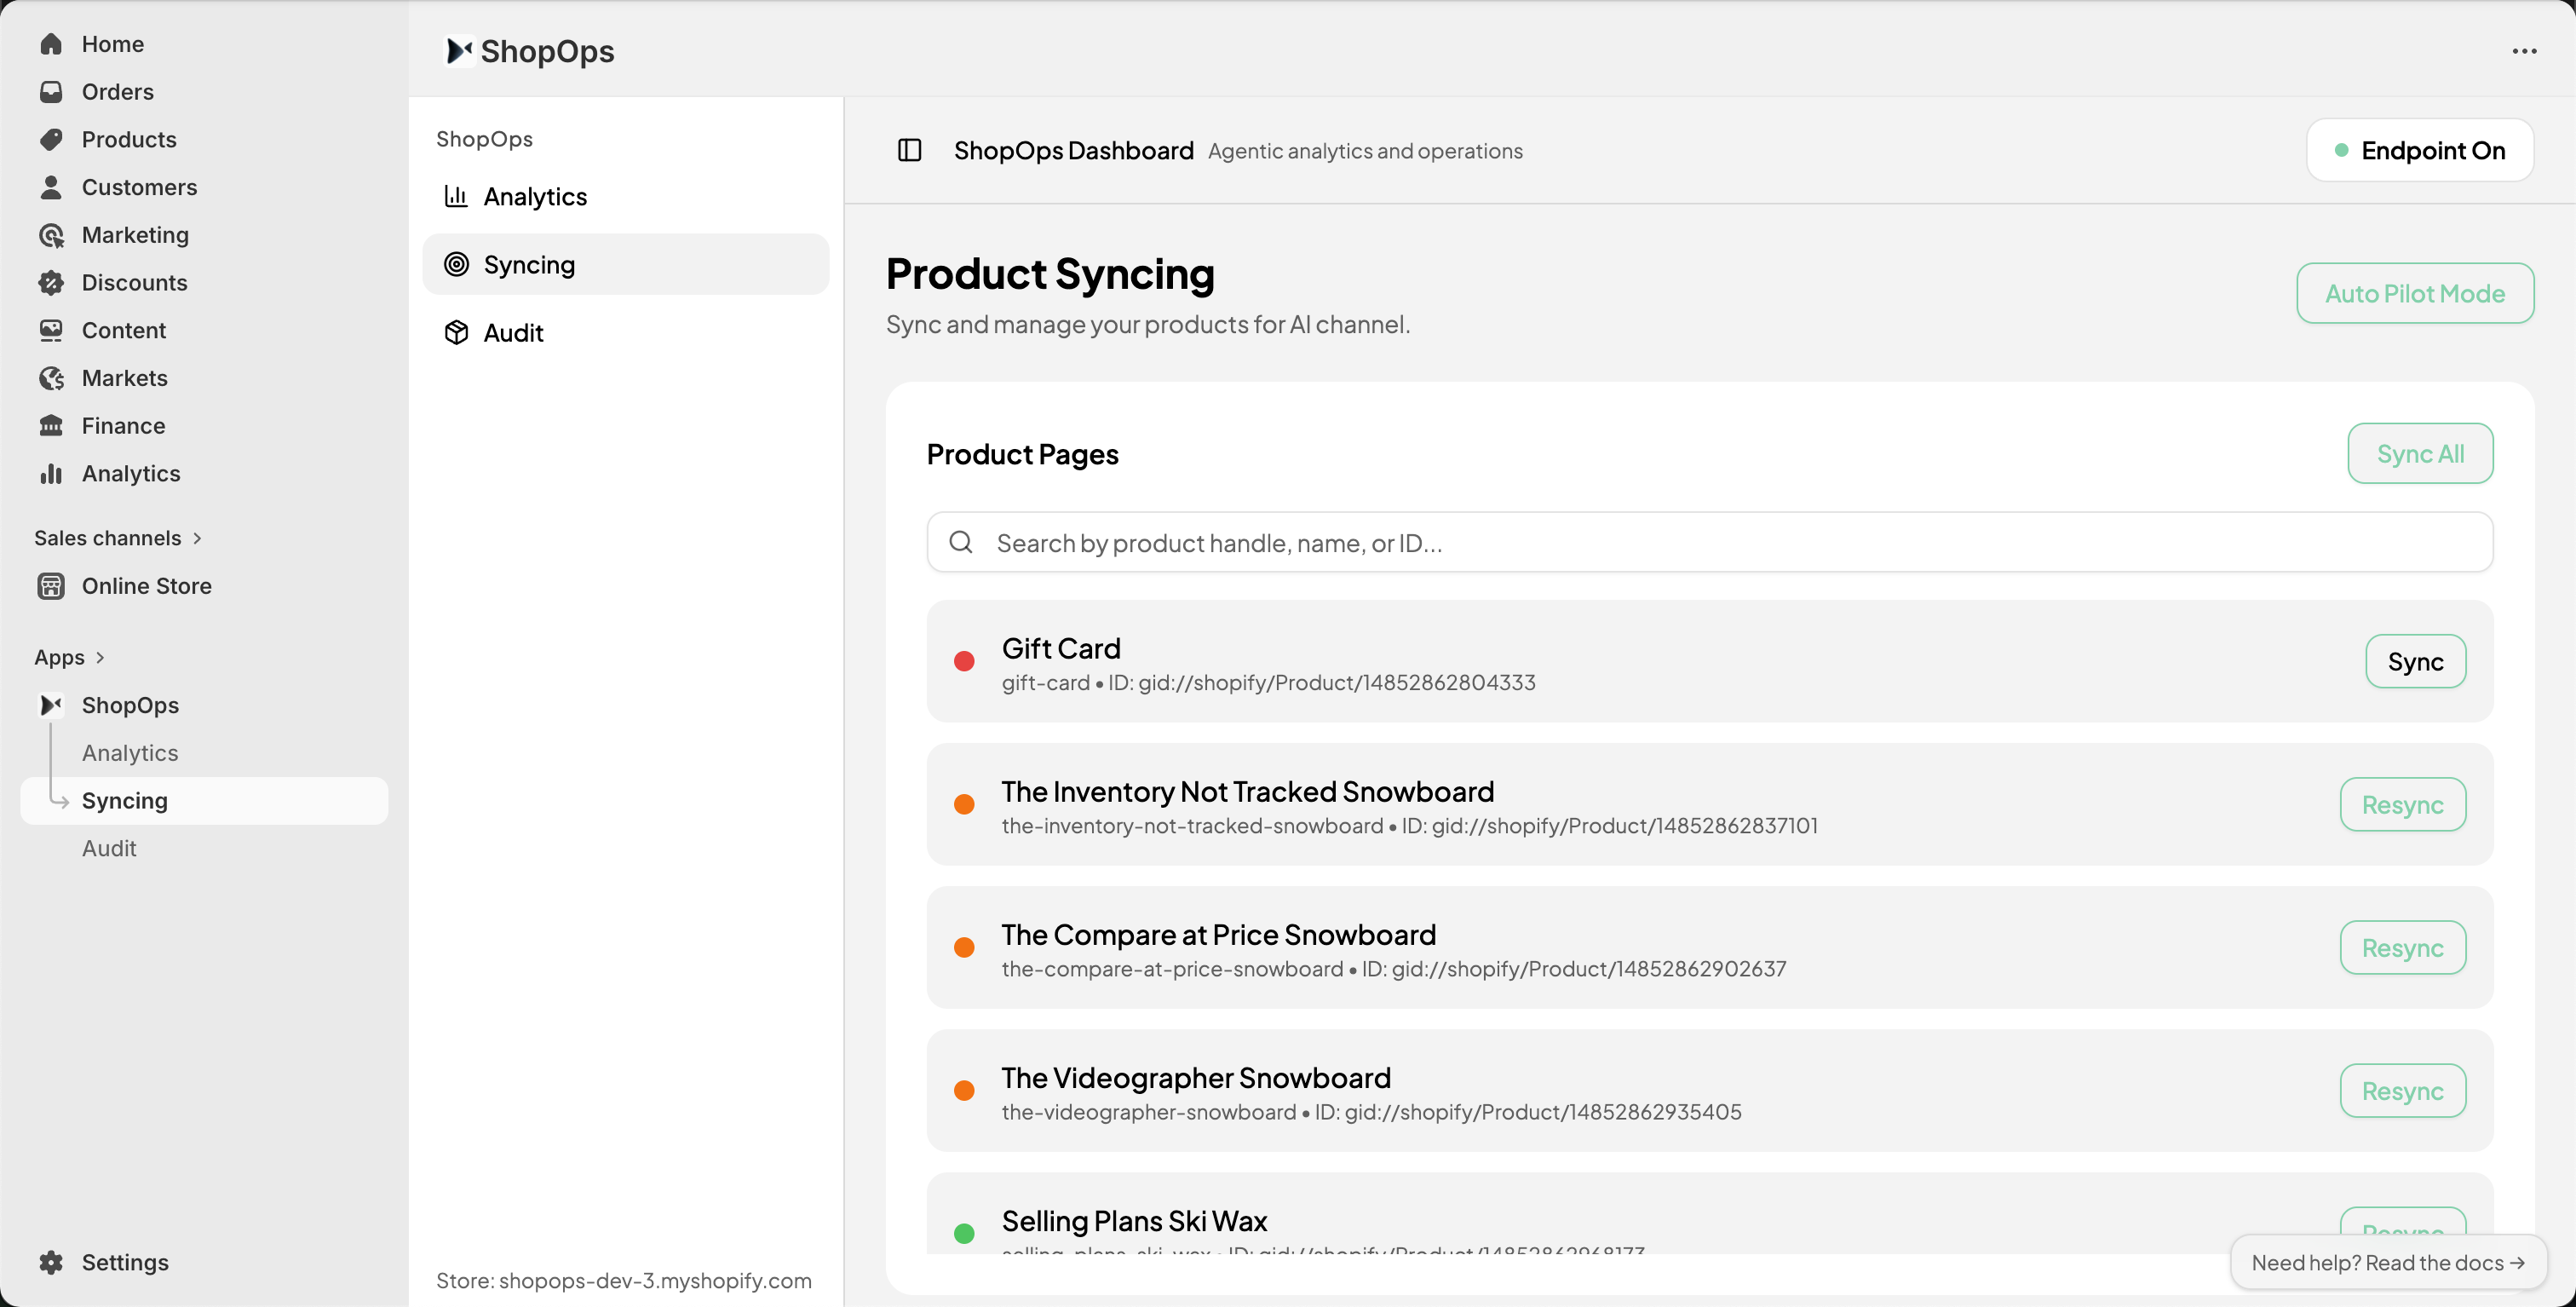
Step 2: Sync Your Agentic Storefront
Inside the ShopOps app:
- Open the ShopOps app inside Shopify.
- Click Sync All, or start with a single product.
- Wait until processing is complete.
During this step:
- Product data is restructured for agent reasoning
- Attributes are normalized and intent-tagged
- Inventory and fulfillment are made transaction-ready for agents
During the pilot phase, only Product Detail Pages (PDPs) are processed.
Step 3: Enable the ShopOps Router
The ShopOps Router allows your store to:
- Respond to agent-originated traffic even before ACP/UCP
- Route requests to the correct product supply endpoints
Steps:
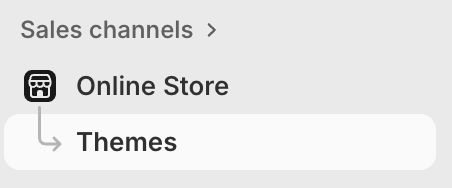
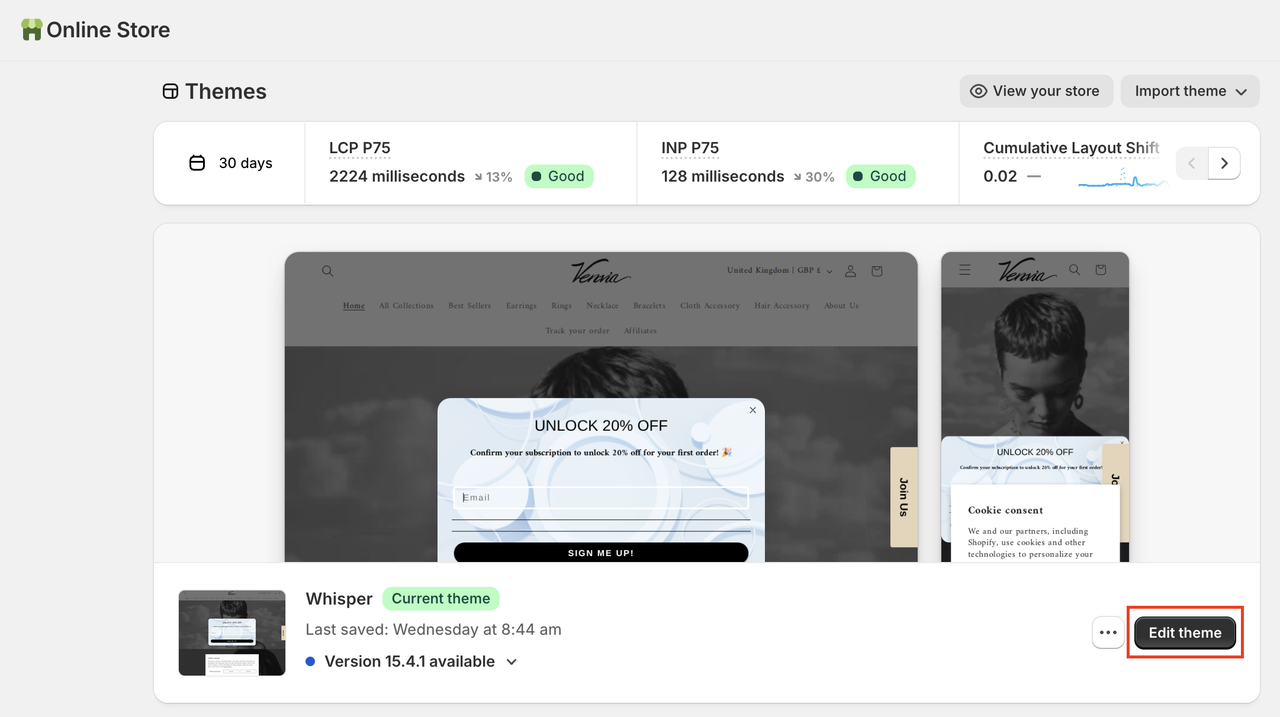
- Go to Themes in Shopify Admin
- Click Edit theme
- Open App embeds
- Enable ShopOps Router
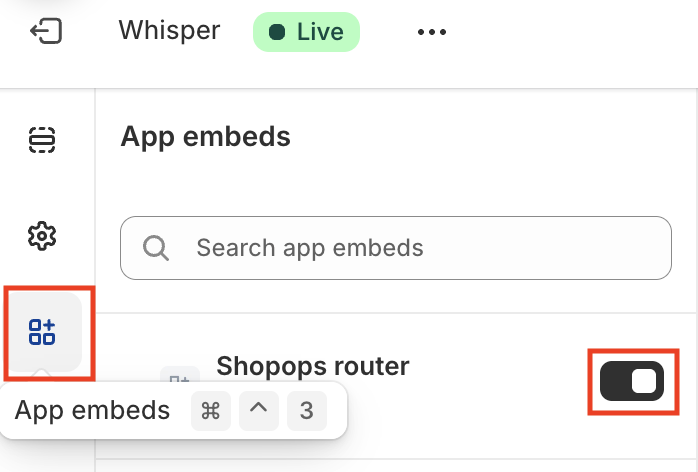
This does not change your customer-facing storefront.
Step 4: You Are Now Live on the ShopOps Platform
🎉 Your store is now connected to the ShopOps To-Agent marketplace.
AI agents can now:
- Discover your products
- Reason over pricing and attributes
- Quote, transact, and complete checkout programmatically
Without:
- Manual feeds
- Channel-specific operations
- Brand dilution
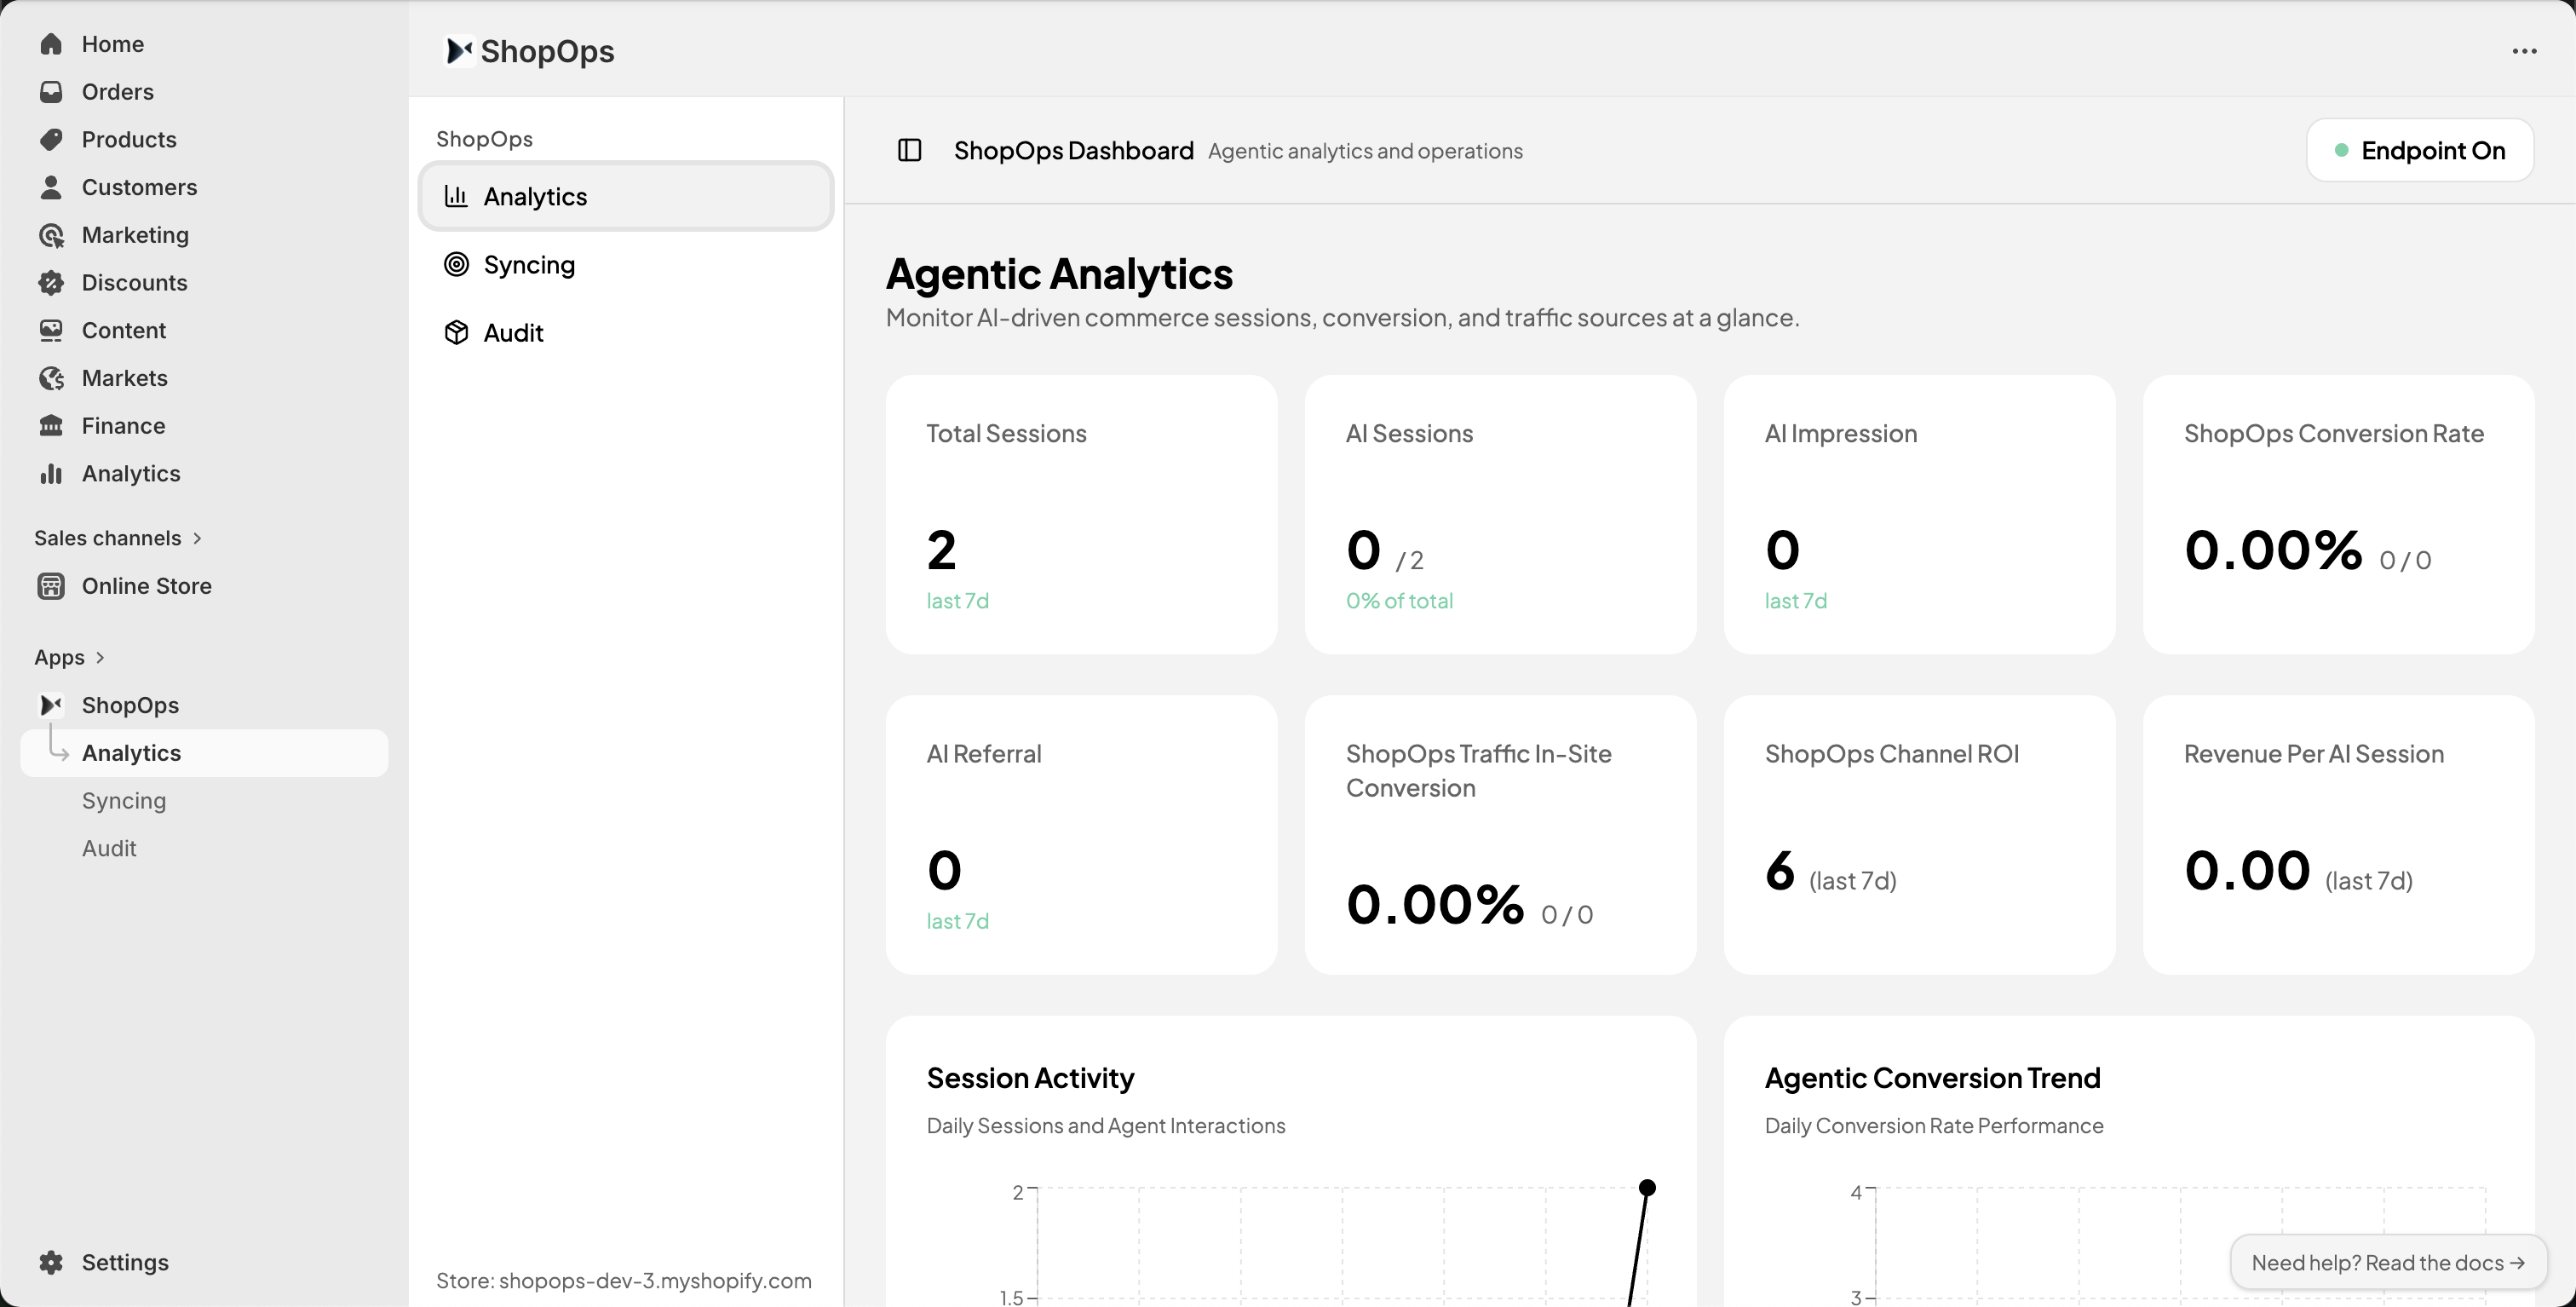
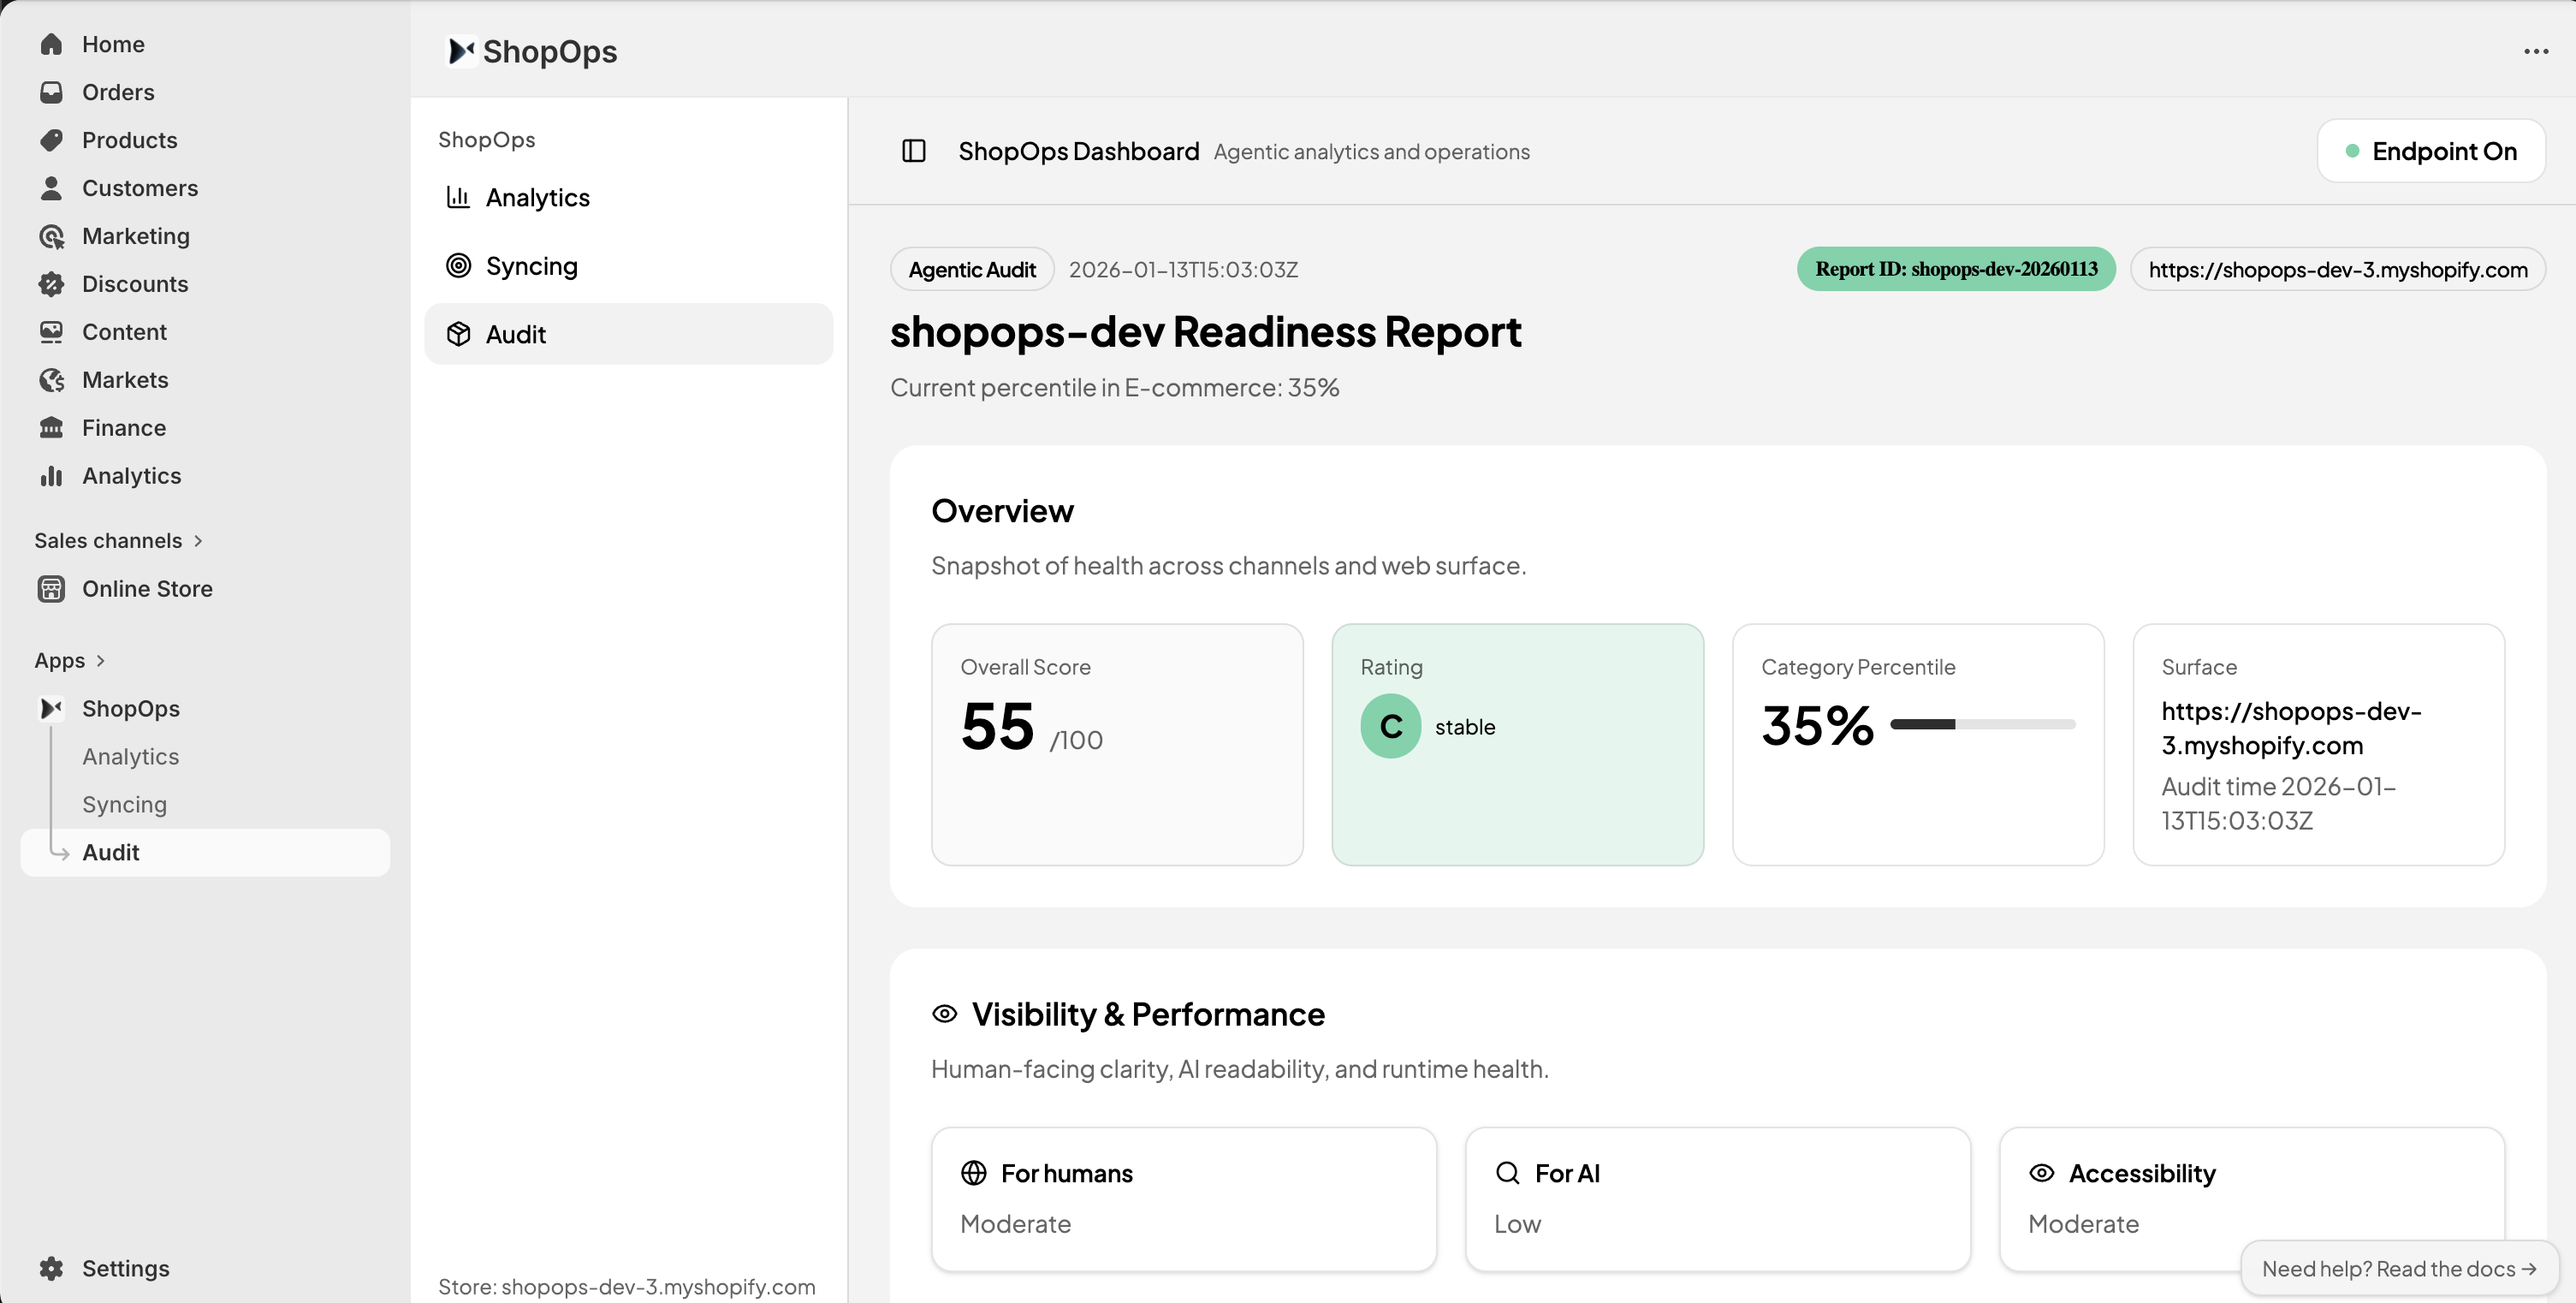
Step 5: Track Agentic Commerce Performance
Use the ShopOps Dashboard & Audit to:
- Track agent-originated impressions, sessions, and GMV
- Understand how agents interpret your products
- Identify missing or ambiguous supply signals
- Improve conversion in agent-driven transactions

For Non-Shopify Merchants
If you operate:
- A custom storefront
- A headless commerce stack
- A marketplace or brand group
You can integrate via the ShopOps API to participate in the platform.
For AI Apps & Agent Builders
If you are building:
- AI shopping assistants
- Lifestyle agents
- Vertical AI applications
You can embed commerce via the ShopOps SDK, which provides:
- Unified product access
- Quoting and checkout
- Fulfillment and after-sales handling
Need Help?
If you encounter issues:
- Confirm the ShopOps app is installed
- Ensure product syncing has completed
- Verify the Router embed (if enabled)
Contact the ShopOps team for support.